SpringBoot整合Spring Security (三)
一、OverView
在前后端不分离时代,可能使用的就是上一节中这种方法;在现在这种前后端分离遍地走的情况下,已经不再推荐使用传统的 session ,而是使用现在比较流行的 JWT 这种 token 的方式解决
对比分析一下:
|
有状态登录 |
无状态登录 |
| 定义 |
服务端需要记录每次会话的客户端信息,从而识别客户端身份,根据用户身份进行请求的处理 |
服务端不保存任何客户端请求者信息;客户端的每次请求必须具备自描述信息,通过这些信息识别客户端身份 |
| 优点 |
比较方便,不需要做多余的处理 |
使用 token 很灵活;服务端不需要存数据;客户端也可以发送给多个服务器 |
| 缺点 |
只能是网页端,在 IOS、Android不行;服务端保存大量数据;集群化不太行 |
配置稍微复杂(其实在框架的加成下,不复杂) |
有状态登录
- 🌰:在 Tomcat 中,用户登录后,需要把用户的信息保存在服务器的 session 中,然后发送给用户一个 Cookie 值,记录对应的 session 值,等用户下一次再次访问该服务器时,浏览器会自动带上这个 Cookie 值,服务端再识别其中的 session 值,进行判断
无状态登录
- 🌰:客户端发送账户密码到服务端进行验证;认证后服务端发送一个 token 给客户端;以后客户端每次发送请求都将 token 携带上进行认证,进行判断
二、Test
在前后端分离的基础上,现在前端和后端只是通过 JSON 进行交互,所以现在的页面跳转全部由前端进行控制,后端只是返回不同的 JSON 罢了
重写SecurityConfig中的 configure 方法:
1
2
3
4
5
6
7
8
9
10
11
12
13
14
15
16
17
18
19
20
21
22
23
24
25
26
27
28
29
30
31
32
33
34
35
36
37
38
39
40
41
42
| @Override
protected void configure(HttpSecurity http) throws Exception {
http.authorizeRequests()
.anyRequest().authenticated()
.and()
.logout()
.logoutUrl("/logout")
.logoutSuccessUrl("/login.html")
.logoutSuccessHandler((httpServletRequest, httpServletResponse, authentication) -> {
httpServletResponse.setContentType("application/json;charset=utf-8");
PrintWriter out = httpServletResponse.getWriter();
out.write("注销成功");
out.flush();
out.close();
})
.and()
.formLogin().loginPage("/login.html")
.loginProcessingUrl("/securityLogin")
.permitAll()
.failureHandler((httpServletRequest, httpServletResponse, e) -> {
httpServletResponse.setContentType("application/json;charset=utf-8");
PrintWriter out = httpServletResponse.getWriter();
out.write(e.getMessage());
out.flush();
out.close();
})
.successHandler((httpServletRequest, httpServletResponse, authentication) -> {
Object principal = authentication.getPrincipal();
httpServletResponse.setContentType("application/json;charset=utf-8");
PrintWriter out = httpServletResponse.getWriter();
out.write(new ObjectMapper().writeValueAsString(principal));
out.flush();
out.close();
})
.and()
.csrf().disable()
;
}
|
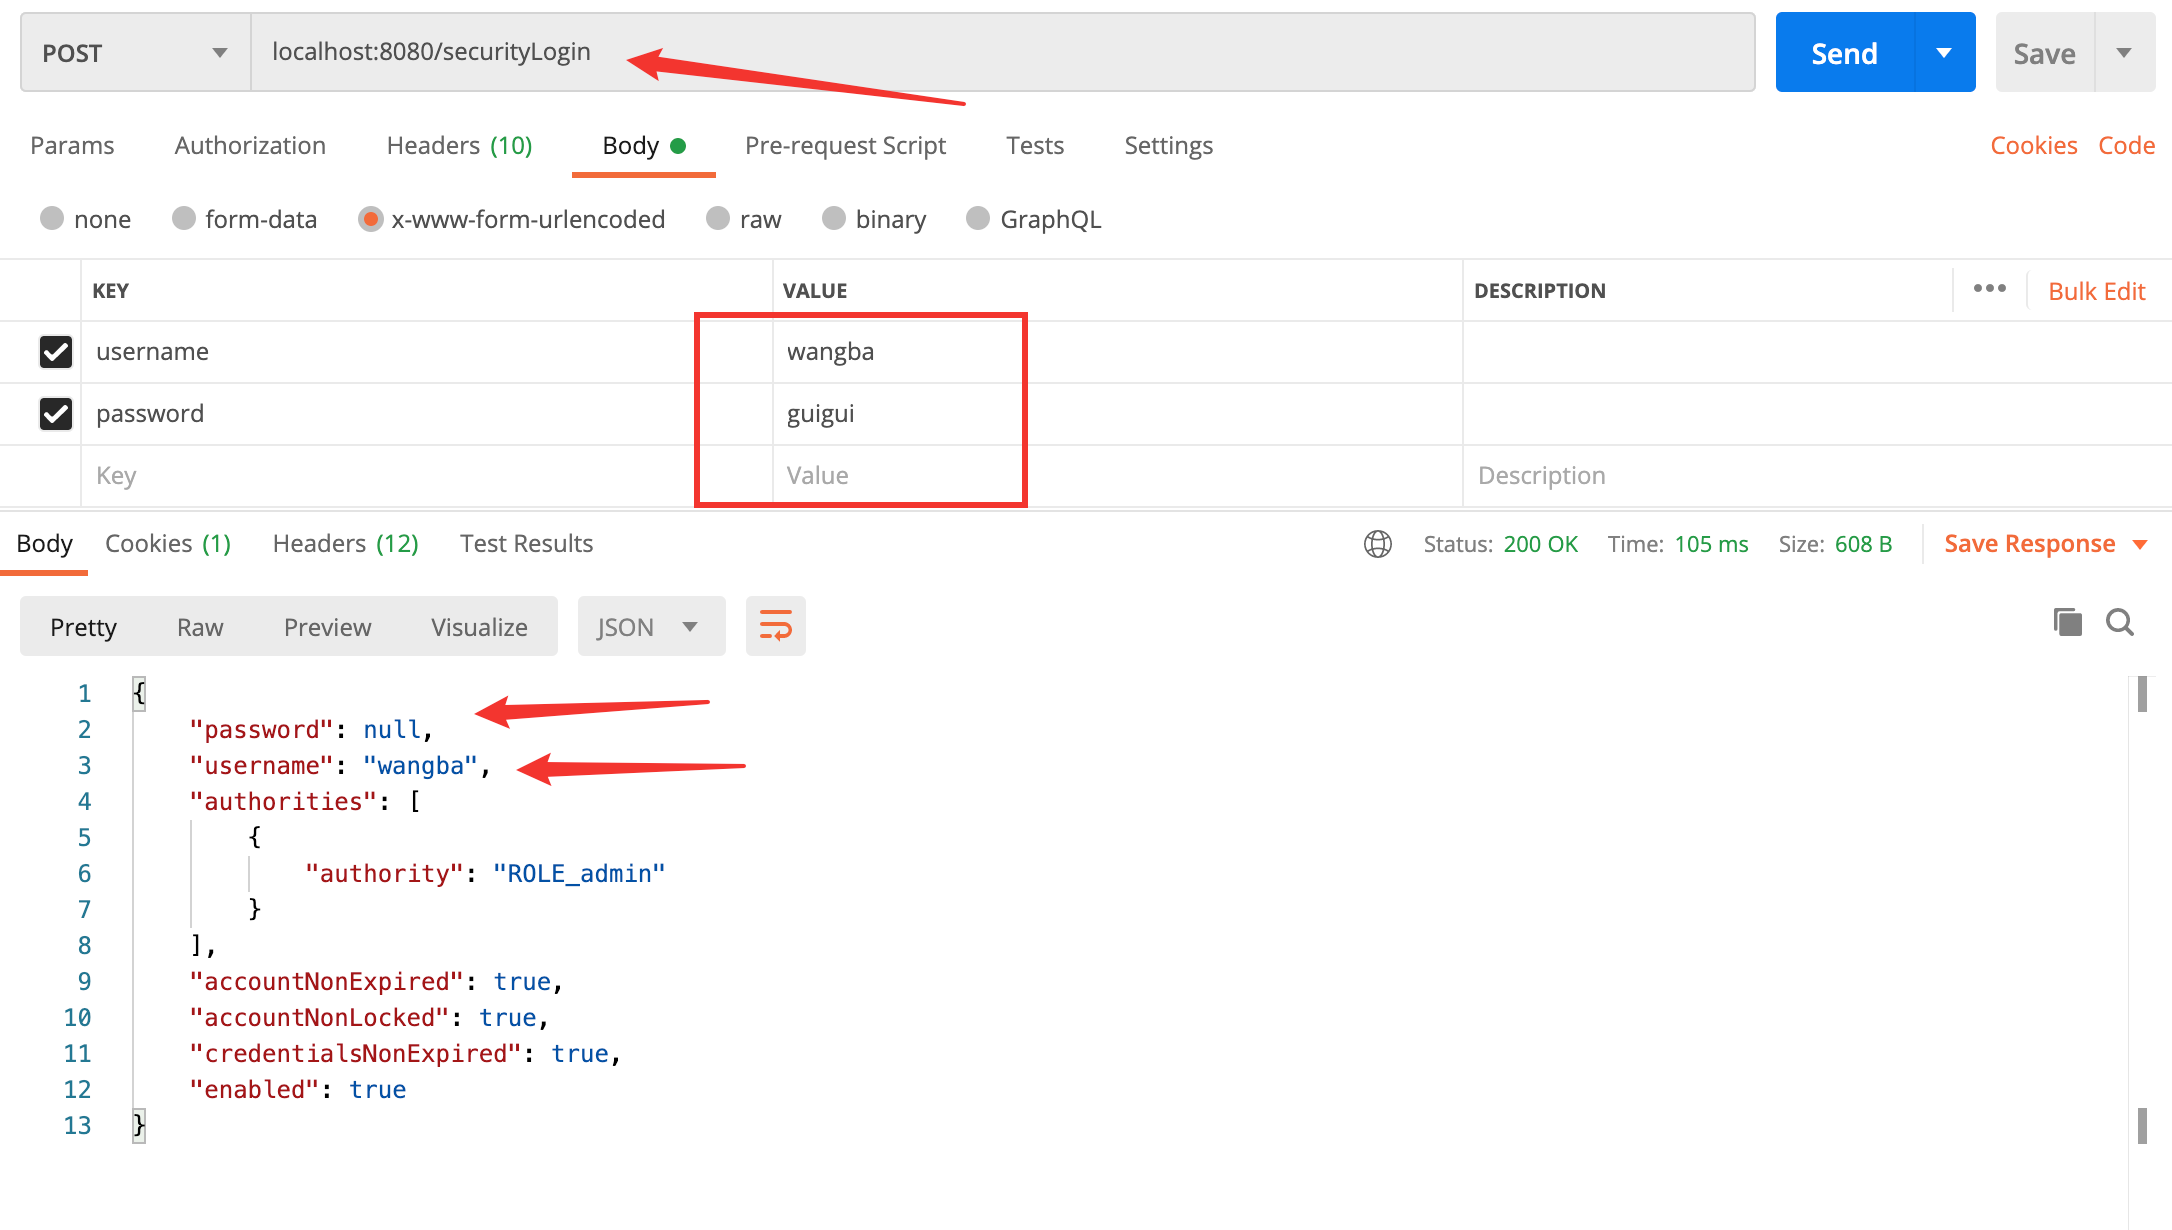
登录接口
注:
- 可以看到使用前后端分离,就不需要后端来控制跳转页面等,只需要将 JSON 发给前端就行
- 这里面的 password 为空,是框架做的,具体可以看这里
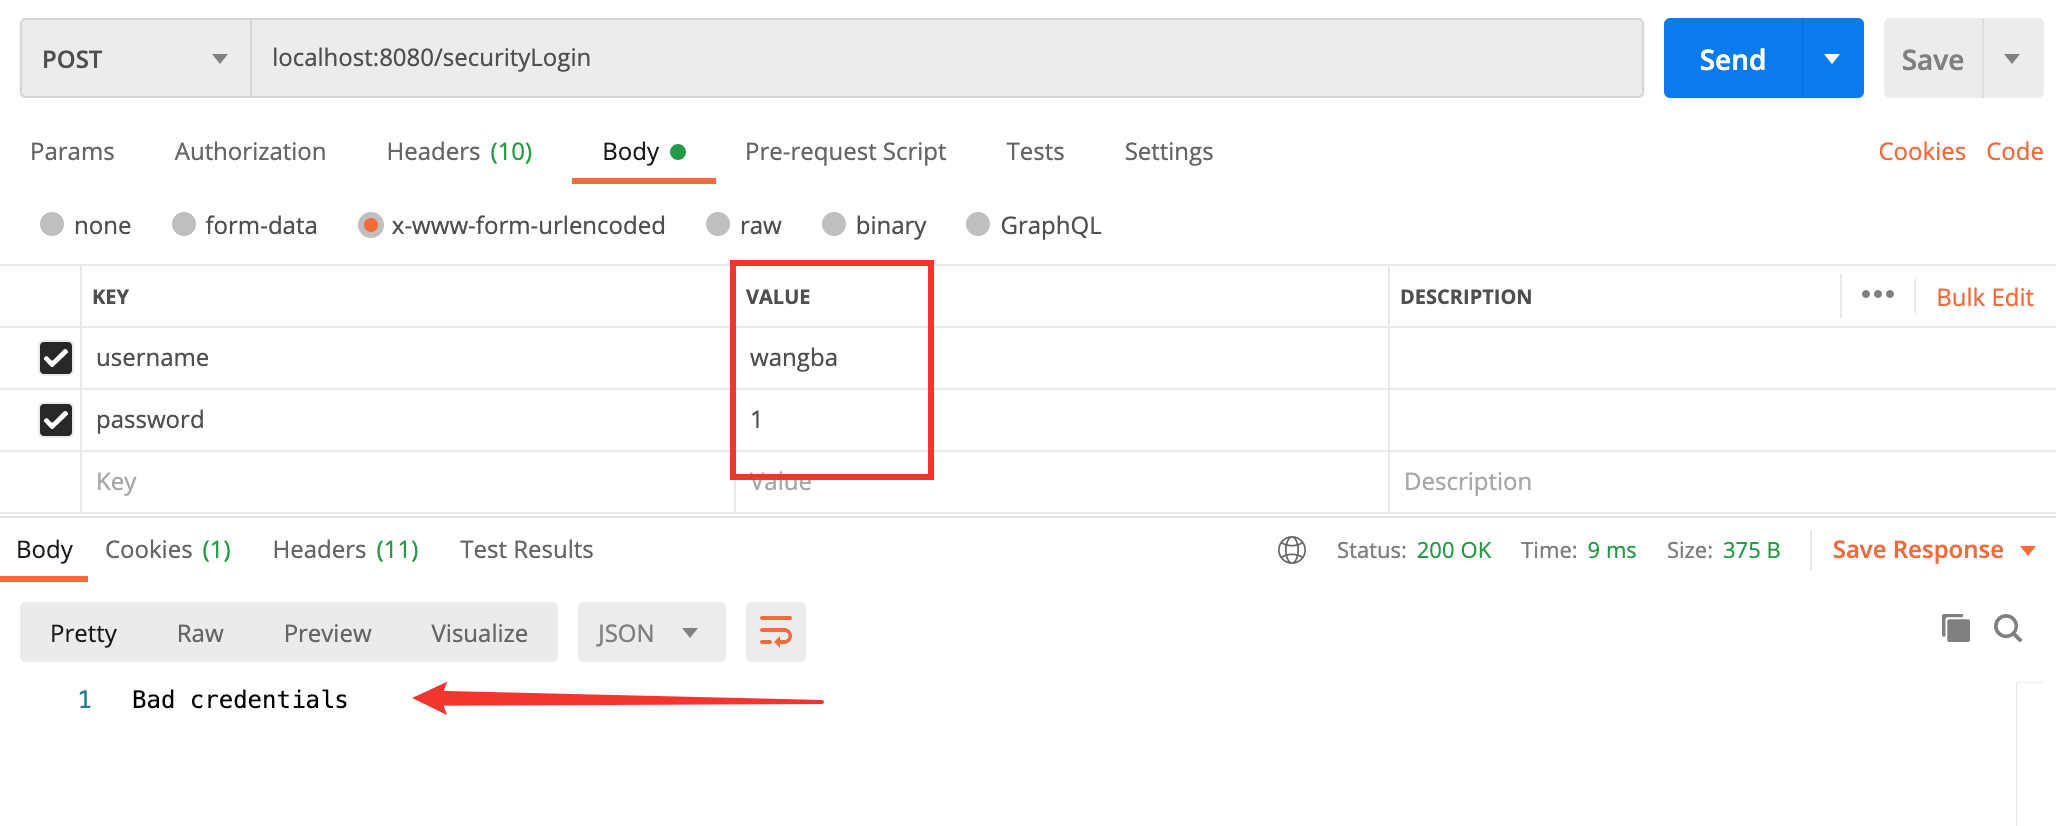
登录失败
注:
- 无论是用户名和密码其中一个错误,就会返回 Bad credentials 提示,主要也是为了安全着想,具体流程可以看下面的 3.1 小节
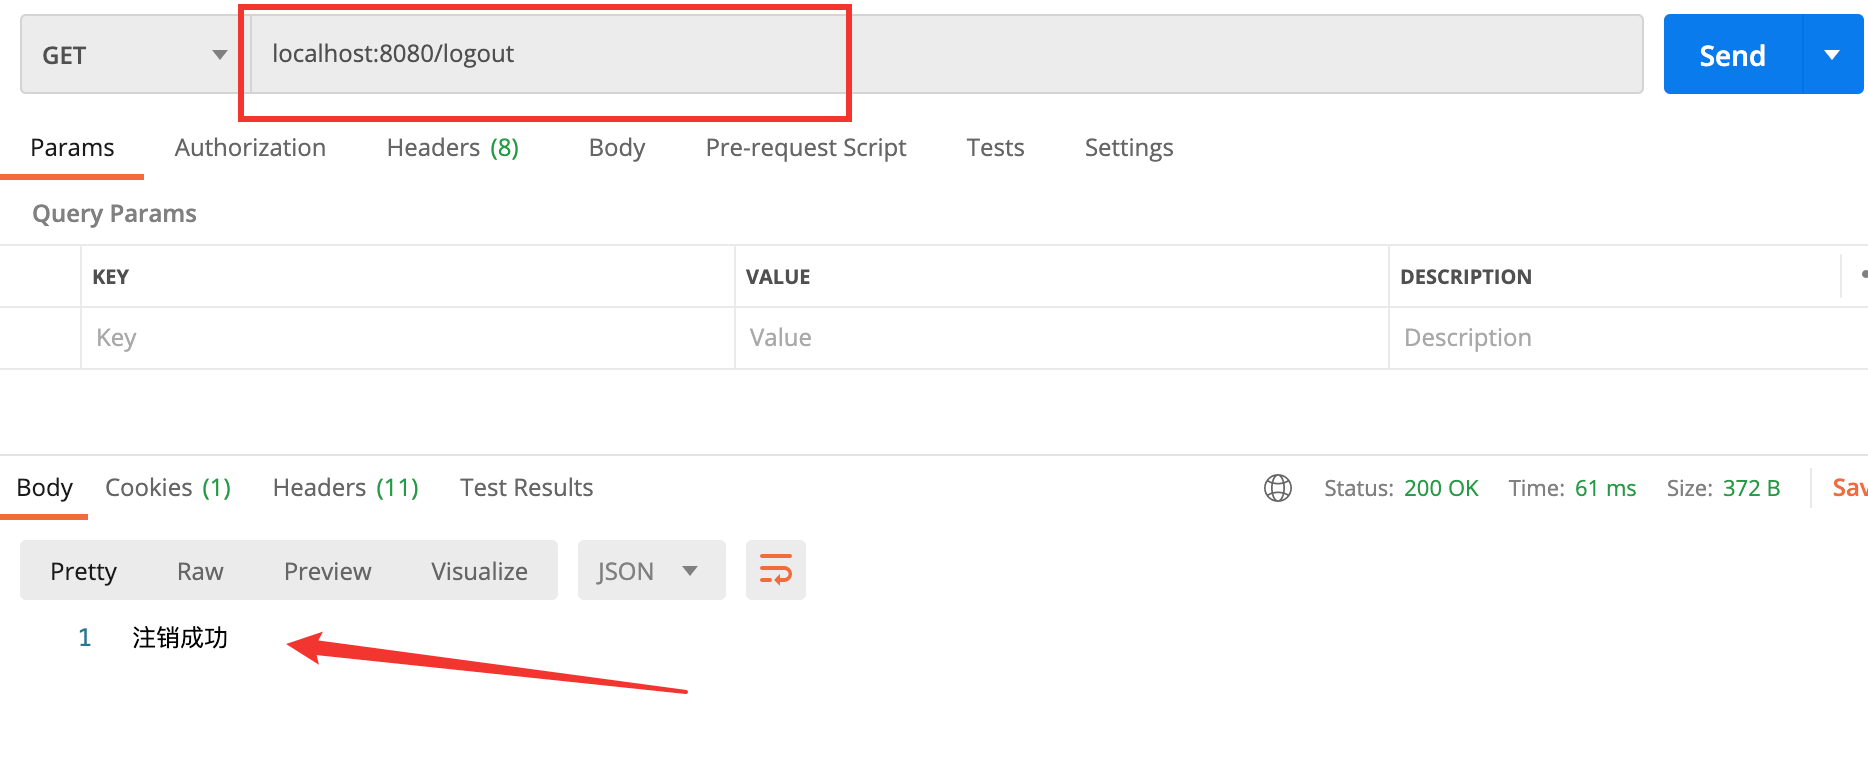
注销登录
三、Deep Learning
3.1 深入了解登录失败
在上面我们提到了无论是用户名和密码其中一个错误,就会返回 Bad credentials,实则在其中还有很多种错误,而且用户名是有用户名错误,只是最终被 Bad credentials 覆盖了,稍微分析一下:
AbstractUserDetailsAuthenticationProvider
1
2
3
4
5
6
7
8
9
10
11
12
13
14
15
16
17
18
19
| public Authentication authenticate(Authentication authentication) throws AuthenticationException {
Assert.isInstanceOf(UsernamePasswordAuthenticationToken.class, authentication, () -> {
return this.messages.getMessage("AbstractUserDetailsAuthenticationProvider.onlySupports", "Only UsernamePasswordAuthenticationToken is supported");
});
String username = authentication.getPrincipal() == null ? "NONE_PROVIDED" : authentication.getName();
boolean cacheWasUsed = true;
UserDetails user = this.userCache.getUserFromCache(username);
if (user == null) {
cacheWasUsed = false;
try {
user = this.retrieveUser(username, (UsernamePasswordAuthenticationToken)authentication);
} catch (UsernameNotFoundException var6) {
this.logger.debug("User '" + username + "' not found");
if (this.hideUserNotFoundExceptions) {
throw new BadCredentialsException(this.messages.getMessage("AbstractUserDetailsAuthenticationProvider.badCredentials", "Bad credentials"));
}
}
|
在上面这段代码中,进行调试可以看见:
- 会先在缓存中查询一下是否有过
- 再调用 retrieveUser 来进行判断
- 一旦抛出 UsernameNotFoundException ,就看 hideUserNotFoundExceptions 的值了,如果为 true,就会抛出 Bad credentials
进行断点调试:输错用户名,并打上断点:

通过上图就能看出,hideUserNotFoundExceptions 默认值是 true 的
3.2 未认证处理
在前后端分离,如果出现未认证的状态,不可能控制前端来跳转页面等,只能给前端返回相应的信息即可:
在 AuthenticationEntryPoint 接口中有一个方法:commence
在 LoginUrlAuthenticationEntryPoint 中实现方式为:
1
2
3
4
5
6
7
8
9
10
11
12
13
14
15
16
17
18
19
20
21
22
23
| public void commence(HttpServletRequest request, HttpServletResponse response, AuthenticationException authException) throws IOException, ServletException {
String redirectUrl = null;
if (this.useForward) {
if (this.forceHttps && "http".equals(request.getScheme())) {
redirectUrl = this.buildHttpsRedirectUrlForRequest(request);
}
if (redirectUrl == null) {
String loginForm = this.determineUrlToUseForThisRequest(request, response, authException);
if (logger.isDebugEnabled()) {
logger.debug("Server side forward to: " + loginForm);
}
RequestDispatcher dispatcher = request.getRequestDispatcher(loginForm);
dispatcher.forward(request, response);
return;
}
} else {
redirectUrl = this.buildRedirectUrlToLoginPage(request, response, authException);
}
this.redirectStrategy.sendRedirect(request, response, redirectUrl);
}
|
这段代码中最主要的是看一下 useForward 的默认值,如果是 true,那么默认就是走转发;如果是 false,那么默认走的就是重定向
使出断点调试大法:
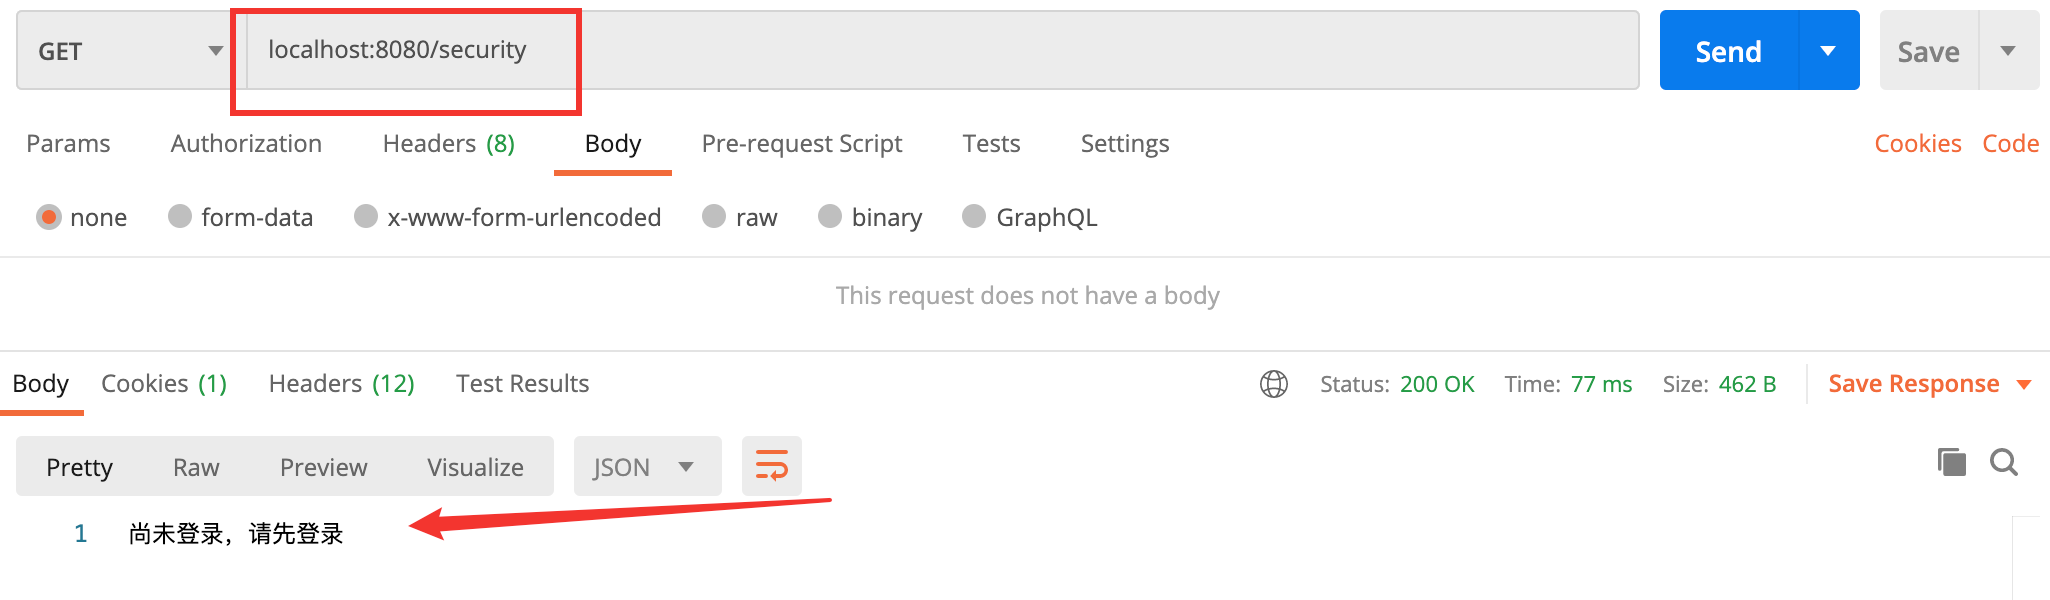
- 在 Postman 中直接使用 GET 方式请求:localhost:8080/security
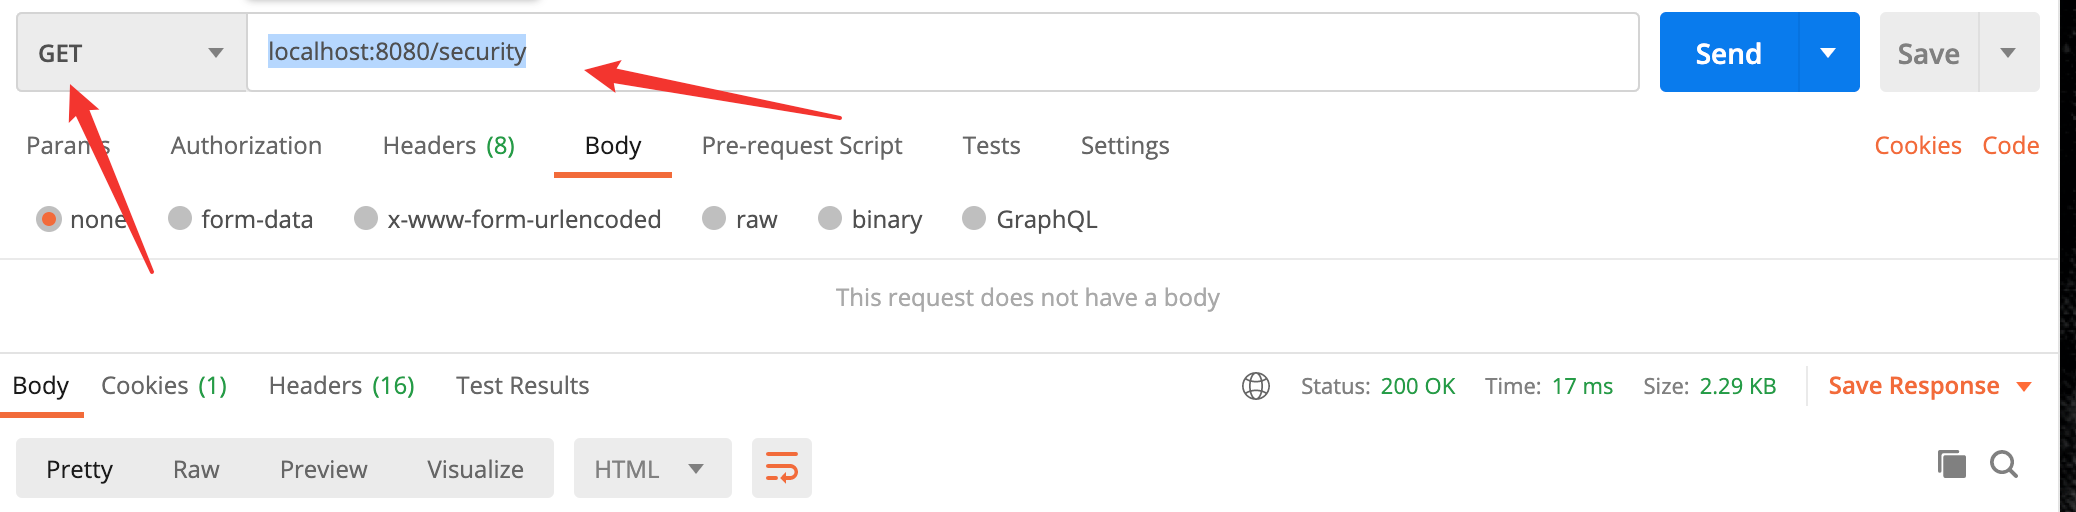
此方法在第一节中已经写过了,就是输出一个 Spring Security
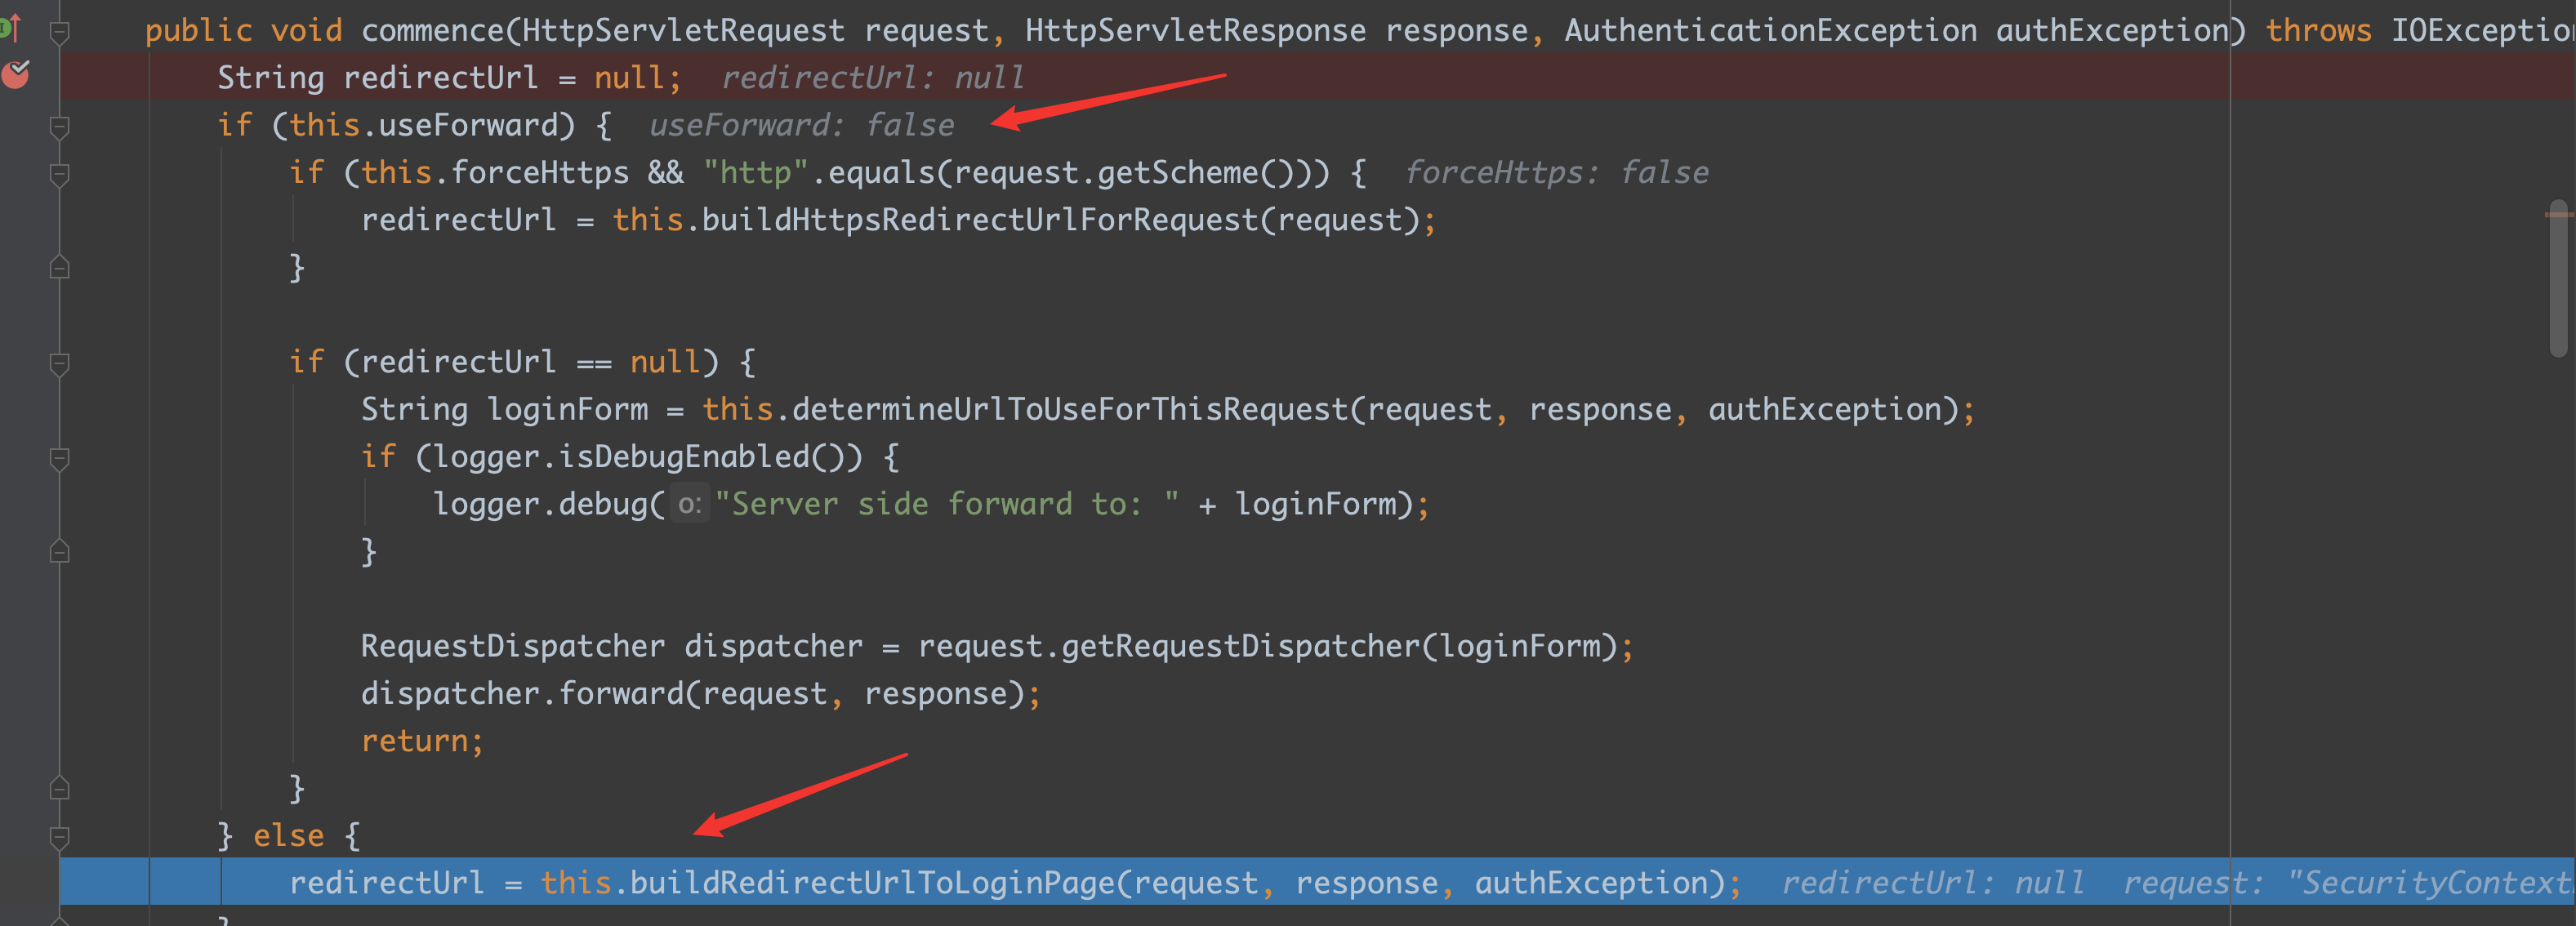
从上面的图就可以看见,useForward 的默认值是 false,那么就可以确定是走的重定向
只需要重写该方法覆盖它就行:
1
2
3
4
5
6
7
8
| .exceptionHandling()
.authenticationEntryPoint((req, resp, authException) -> {
resp.setContentType("application/json;charset=utf-8");
PrintWriter out = resp.getWriter();
out.write("尚未登录,请先登录");
out.flush();
out.close();
})
|